
Sue Bryce Photography – Styling: NECK ART & JEWELRY LAYERING
Sue Bryce Photography – Styling: NECK ART & JEWELRY LAYERING
English | 55m | Video: 1080p
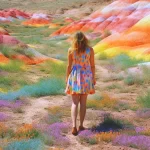
Today is all about neck art and jewelry layering! Create shots that stand out from the crowd with simple DIY pieces that are all about “Being creative, being inventive, being cheap…but being fabulous.” Sue shows you how to turn any element into a gorgeous, one of a kind piece to wrap around your client’s neck, go-to shots and poses, and how to clone in necklaces during the editing process.
LAYERING ELEMENTS – FROM ORDINARY TO EXTRAORDINARY
Make an otherwise boring outfit into something beautiful, even when you have little to no budget for accessories. “Anything that brings the throat to attention is quite exciting,” Sue states, “With layering, jewelry, neckpieces, and elements. You do NOT have to have money to do this.” Go for a walk, cut some things out of the garden, grab some ribbon or a broken necklace, and follow Sue’s tutorial on how to make ordinary things into extraordinary images.
Items Used:
Samples
Tulle
Ribbon
Flowers in a garden
Cheap jewelry
$3.99 Michael’s cherry blossoms
Layered jewelry: Xevana $100-$200 a piece
NECK ART ELEMENTS SHOOT – ELEMENTARY HIGH FASHION
Sue takes us through her various poses and ideas for how to perfectly accentuate the neck and how to use the unique neck and headpieces we have so easily created to our full advantage during a shoot.
Items Used:
butterfly clips.
JEWELRY LAYING SHOOT – NECKLACES UPON NECKLACES
Sue teaches us how to pose clients to accentuate their necks and backs appropriately when they are wearing layers of jewelry. This video is all about the neck and getting that killer beauty shot. We also see how Sue easily creates various hairstyles with one clip to show off clients’ necks.
RETOUCHING #1 – CHOOSING THE FINAL IMAGES
“If you’re going to build a posing manual or practice posing, practice on a long, lean body, because they’re the easiest to shoot. But don’t practice on a model that moves on her own – that won’t teach you anything.” Look through the photoshoot images with Sue and listen while she discusses the poses she used and see which of the 80 images she chose to edit and why.
RETOUCHING #2 – EDITING A FUTURE MODEL
Learn how to soften skin that has some shine with the cloning tool, how to lift one eye that may look smaller than the other, how to fill in gaps in the layering of neckpieces, how to get rid of small items (like a hairdryer) that snuck into an image, how to even out the strobe light when it makes the chest brighter than the face, how to clean up armpit lines, and how to get comfortable using your clone stamp. Finally, Sue takes us into Alien Skin to finalize the image
Previous

Buy CloudGhost with no Extra Fee

Categories
 3D Models & Addons (10,277)
 Adobe Indesign (121)
- Bundle (231)
- E-Books & Audio Books (4)
- Exclusive (106)
- Fashion (1)
- Final Cut Pro X (30)
- Footages (263)
- LUTs (278)
- macOS (549)
- Magazines (208)
- Most Downloaded Videohive (20)
- Photoshop (13,523)
- Actions *.ATN (2,109)
- Brushes *.ABR (1,141)
- Layered *.PSD (451)
- Lightroom Presets (5,691)
- Mock-Up (2,145)
- Shapes *.CSH (22)
- Styles *.ASL (294)
- Transparent *.PNG (1,159)
- Web Design Elements (144)
- Plug-ins (3,815)
- 3ds Max (509)
- After Effects (1,022)
- Cinema 4D (318)
- Illustrator (10)
- Maya (84)
- SketchUp (10)
- Unity (22)
- V-Ray (18)
- Premiere Pro (42)
- PREMIUM FILES (36)
- Presentation Templates (105)
- Prof. & Edu. Tutorials (716)
- SFX Sound (26)
- Software (1,576)
- Windows (1,550)
- 3D CAD (72)
- Development (1)
- Graphic Design (3)
- Multimedia (1)
- Utilities (2)
- Sounds (19)
- Special Fonts (86)
- Special Vectors (2)
- Stock Images (89)
- Abstracts & Textures (7)
- Animals (2)
- Arts & Illustration (1)
- Beauty & Selfcare (4)
- Buildings & Cities (1)
- Business & Finance (1)
- Fashion (4)
- Flowers & Plants (9)
- Food & Drink (20)
- Interiors (2)
- Nature & Landscapes (5)
- People (17)
- Science (1)
- Special Days & Events (3)
- Textures (13)
- Vectors (3)
- People (3)
- VFX (19)
- VideoHive (11,106)
- After Effects (9,546)
- Broadcast Packages (100)
- Elements (233)
- Infographics (50)
- Logo Stings (482)
- Openers (638)
- Product Promo (238)
- Titles (223)
- Video Displays (294)
- Apple Motion Templates (147)
- Christmas Templates (5)
- DaVinci Resolve (65)
- Motion Graphics (312)
- Premiere Pro (883)
- Project Files *.AE (94)
- Stock Footage (25)
- Videos Tutorials (15,551)
- 3D Tutorials (3,191)
- After Effects Tutorials (481)
- Animation (208)
- Crafts (9)
- Design (46)
- Development (221)
- Drawing/Painting tuts (2,298)
- Film & Media (1,171)
- Flash Tutorials (16)
- Marketing (26)
- Networks & Security (106)
- Photography (4,915)
- Photoshop (1,528)
- Premium Video (171)
- Programming (308)
- Web Design Tuts (364)


Checking...
Ouch! There was a server error.
Retry »
Retry »
Sending message...
FILE REQUEST
Fill your request here and our team will try to post this material on the site
